Follow my Journal — JHåland — Motion Branding — Animerte Merkevarer

Viewing entries tagged
photoshop

AI saved you again

Comment

Share

AI saved you again

It's fascinating to realize how many AI tools I've integrated into my daily work routine.

For instance together with chatgpt to enhance my website's text, aiming to make my message more concise and understandable. You still need to do some tweaking to get it right, but at least you get a head start.

At a out door photo session I did I could now push the photos from good to greater. With the assistance of Topaz Denoise, an AI tool, I was able to eliminate unwanted grain and enhance the overall sharpness of the photos. And I often use Topaz Photo to scale up images from Mid Journey too.

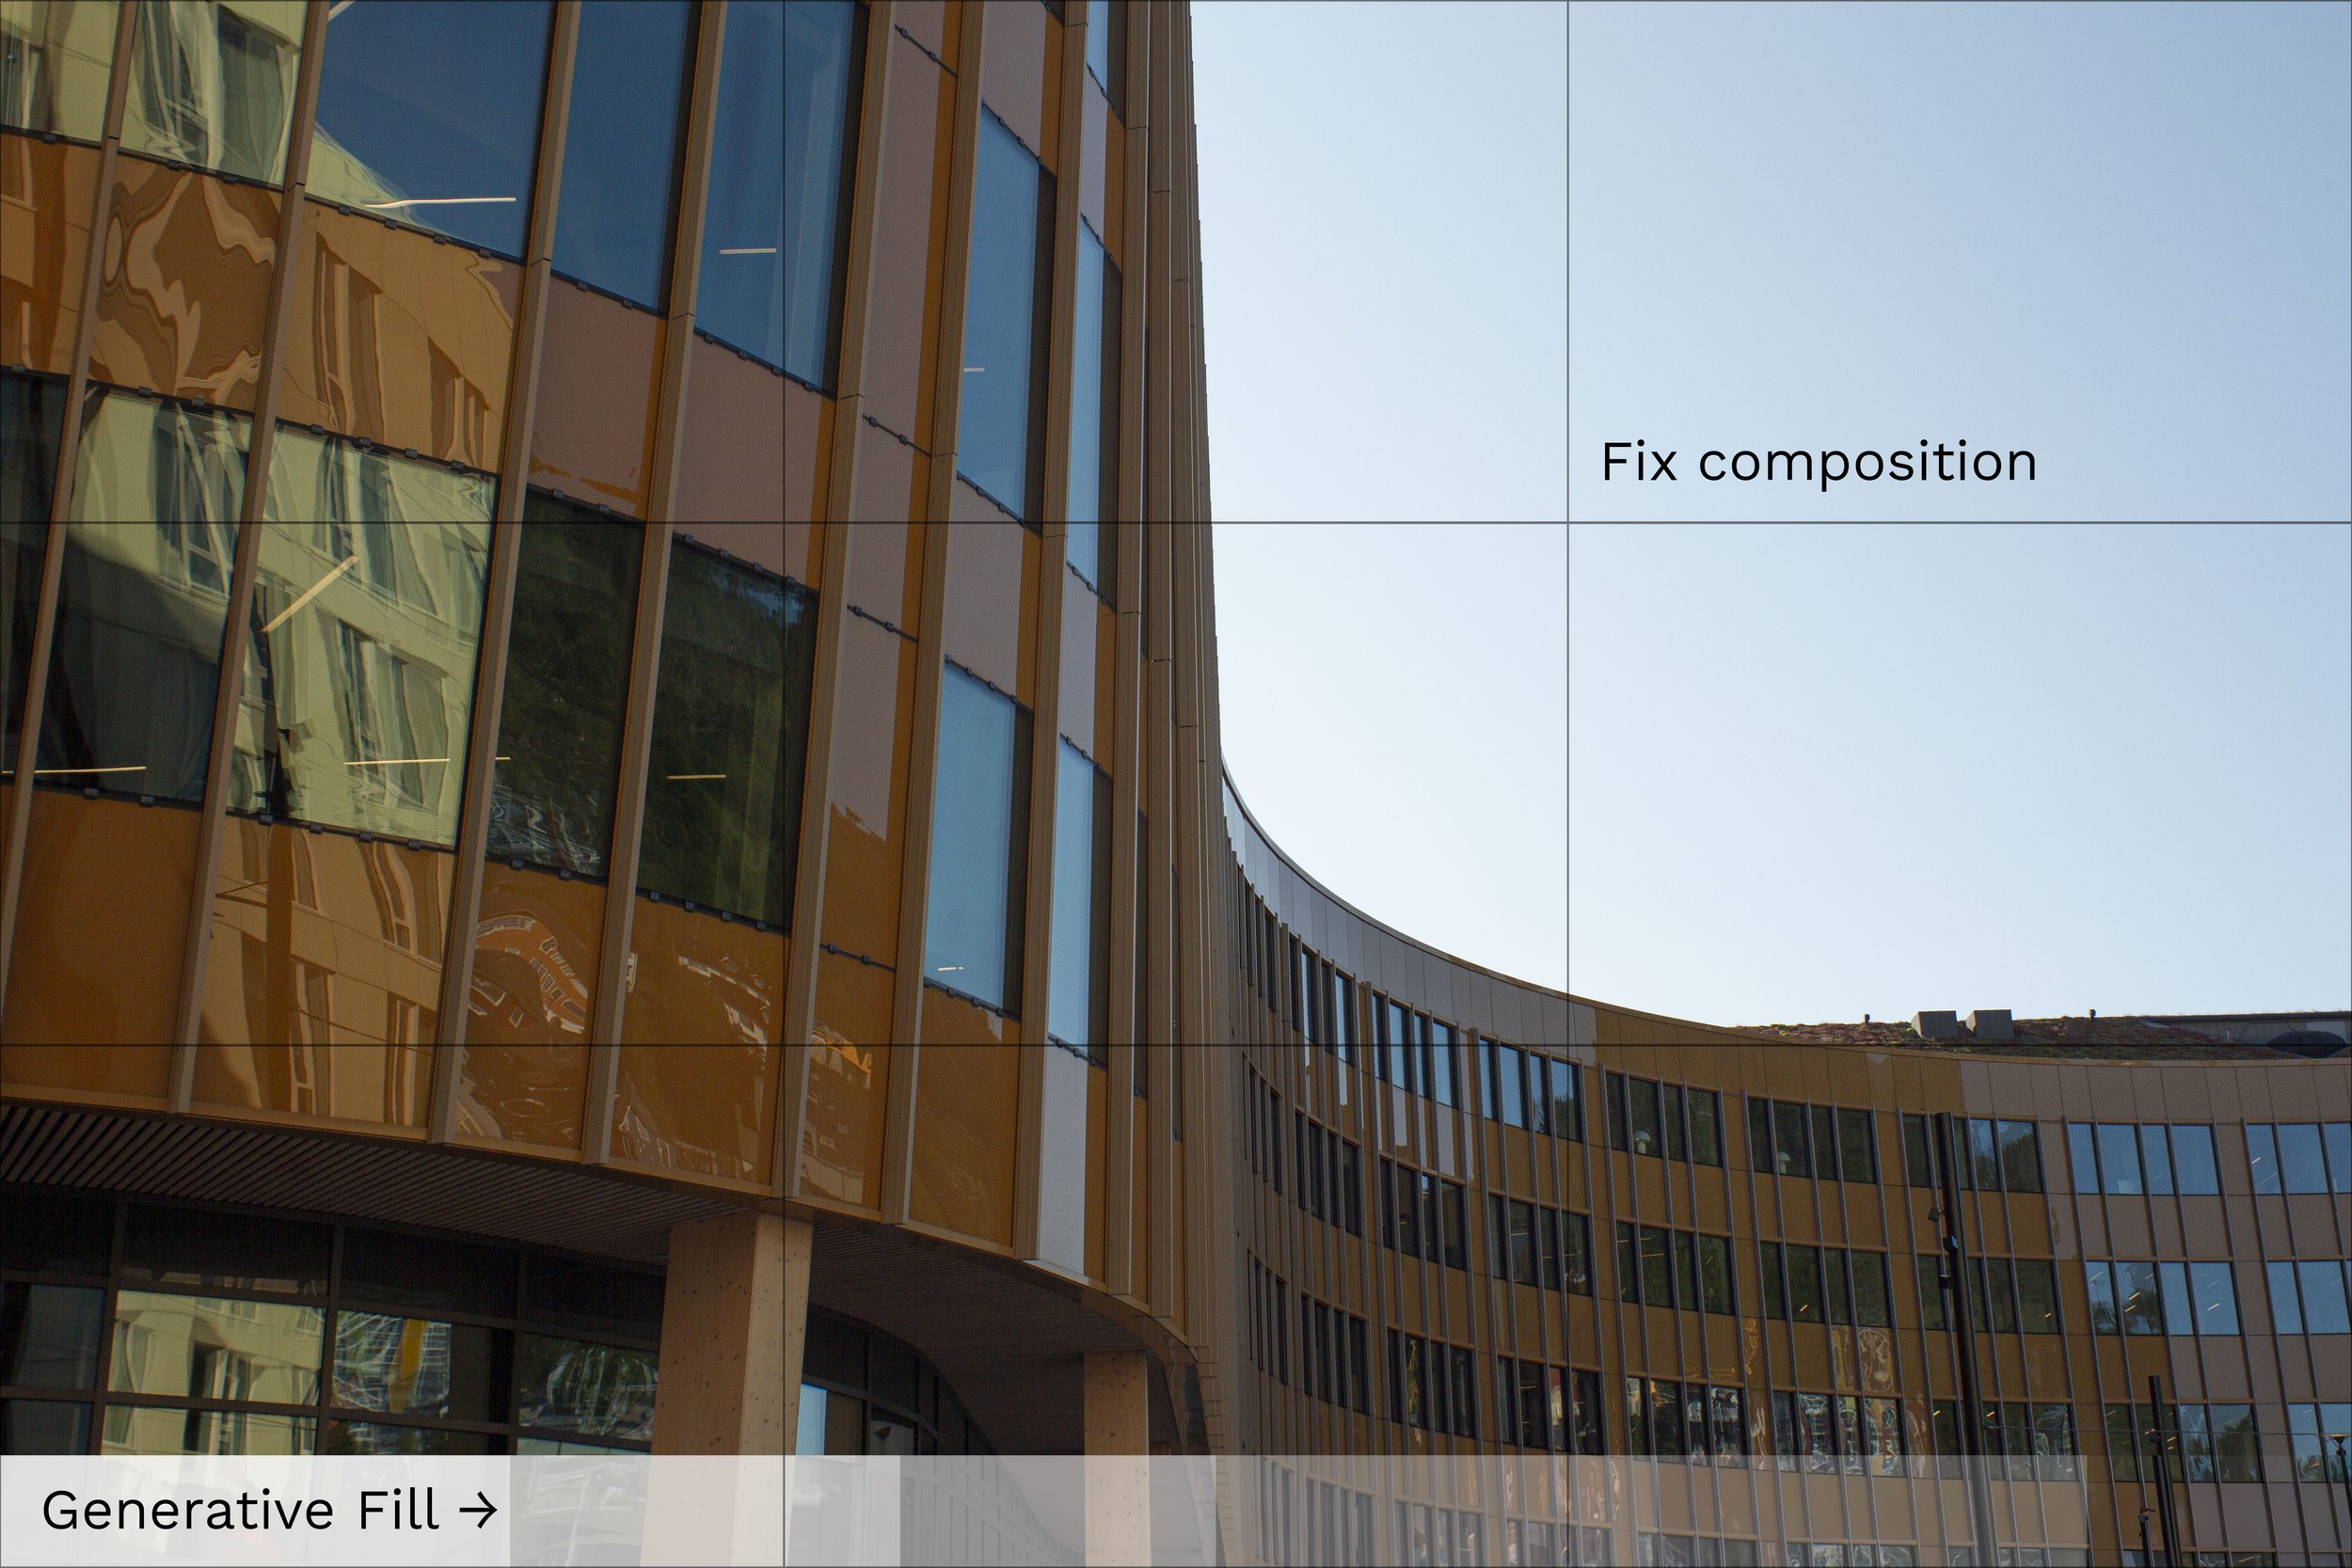
In my experience, I often see where the composition of a photograph could be improved back at the office. Although I had previously relied on my skills in photo manipulation, the new Photoshop beta generative fill feature has made the process significantly easier. Particularly for nature and background elements, this tool delivers impressive results, and also just change faces that are in the background. By incrementally applying generative fill in small steps, it becomes easier to obtain synthesized results of high quality, resulting in sharper outputs. It’s still early days for generative fill.

As AI continues to advance I’m looking forward when even animations are easy to generate, and I aim to remain at the forefront when it comes to new tools to make the day to day taks easier to handle.

Overall, the integration of AI tools has change the way I work and allowing me to achieve greater efficiency and creativity.

Comment

Share

Remove dust and scratches in Photoshop

Comment

Share

Remove dust and scratches in Photoshop

In this tutorial I show a trick that makes it much easier to see details that you feel but don't necessary see. By using curves it reveals problem areas that is hard to see. It's not a quick fix solution but it's a good solution.

And I also talk about why you , as a 3D artist of some sort, should do photography and also how to tell simple stories by adding the right details.

I'm close to a 1000 subscribers and as you may have heard, YouTube has added a new ceiling for moneytization on videos, so I need more followers to reach that goal. So hope you can share my videos and of course subscribe :)

Comment

Share

Follow up tutorial and PBR texture freebies

Comment

Share

Follow up tutorial and PBR texture freebies


In this follow up tutorial on how to create Object ID for your fabrics, I only use Photoshop to create these maps. This really depends on your source texture and other element if it's easy or hard. Sometimes you need to do a lot of small tweaking to make it work, and here I show you the main principles.

In this follow up tutorial on how to create Object ID for your fabrics I use only Photoshop to create these maps. This really depends on your source texture and other element if it's easy or hard. Sometimes you need to do a lot of small tweaking to make it work, and here I show you the principles.

If you haven't seen Fabulous Fabrics I recommend you do that :)

Poliigon has started creating fabric textures with Object ID maps. They add a more convincing look on your fabric, and they are really easy to create your self. In Arnold render you can connect these to the coat layer in standard surface (Arnold 5) and I really like the result that gives.

You find the free texture pack here:


Comment

Share

Fabulous Fabric with Object ID maps

Comment

Share

Fabulous Fabric with Object ID maps


Poliigon has started creating fabric textures with Object ID maps. They add a more convincing look on your fabric, and they are really easy to create your self. In Arnold render you can connect these to the coat layer in standard surface and I really like the result that gives.

I show how I used it to create a wool material for a Hiroshima Chair by Naoto Fukasawa.

If you have a material suggestion, write it in the comments :)

Here is the free Fleece texture: https://www.poliigon.com/texture/2332
(and I have nothing to do with their site :)

Cinema 4D https://www.maxon.net/en/
Arnold Render https://www.solidangle.com/
Photoshop/Illustrator http://www.adobe.com/


Poliigon has started creating fabric textures with Object ID maps. They add a more convincing look on your fabric, and they are really easy to create your self. In Arnold render you can connect these to the coat layer in standard surface and I really like the result that gives.

Comment

Share

Arnold Ice Material Tutorial  - Using Cinema 4d, Arnold Render, B2M & Photoshop - Texture02

2 Comments

Share

Arnold Ice Material Tutorial - Using Cinema 4d, Arnold Render, B2M & Photoshop - Texture02


In this tutorial I show how to create an ice material for Arnold Render. In photoshop I make the material base based on a picture. It's made square and seamless for ease of use. Then processed in Bitmap2Material to create different texture maps. Then mixed together in Arnold Render.

In this tutorial I show how to create an ice material for Arnold Render. In photoshop I make the material base based on a picture. It's made square and seamless for ease of use. Then processed in Bitmap2Material to create different texture maps. Then mixed together in Arnold Render.

This is a little more advanced then the first material tutorial, and hope you like it.

Cinema 4D
Arnold Render
Anders Langalands
Bitmap2Material
Photoshop


2 Comments

Share

Leather Material Tutorial

Comment

Share

Leather Material Tutorial


As the title says, in this leather material tutorial I show my main method of creating materials. In photoshop I make the material base based on a picture. Sometimes from the web or a picture I've taken. It's made square and seamless for ease of use.

After a couple of larger updates by Arnold Renderer some parts of the tutorial is now old and not up to date. Anders Langlands addon to Arnold is deprecated and not possible to use anymore. But many of the principles is still possible to use, and that’s why I do not remove this tutorial form Youtube. Thank you for your understanding :)

As the title says, in this leather material tutorial I show my main method of creating materials. In Photoshop I make the material base often from an image. Sometimes I find this image on the web or a I take my own picture. It's made into a square and then made seamless for ease of use in 3D. Then processed it in Bitmap2Material or Materialize (only on windows) to create different texture maps. Then mixed together in Arnold Render.

Cinema 4D
Arnold Render
Anders Langlands
Bitmap2Material
Materialize
Photoshop


Comment

Share